
javaweb学习总结(二十二)——基于Servlet+JSP+JavaBean开发模式的用户登录注册
一、Servlet+JSP+JavaBean开发模式(MVC)介绍
Servlet+JSP+JavaBean模式(MVC)适合开发复杂的web应用,在这种模式下,servlet负责处理用户请求,jsp负责数据显示,javabean负责封装数据。 Servlet+JSP+JavaBean模式程序各个模块之间层次清晰,web开发推荐采用此种模式。
这里以一个最常用的用户登录注册程序来讲解Servlet+JSP+JavaBean开发模式,通过这个用户登录注册程序综合案例,把之前的学过的XML、Xpath、Servlet、jsp的知识点都串联起来。
二、创建MVC架构的Web项目
在MyEclipse中新创建一个webmvcframework项目,导入项目所需要的开发包(jar包),创建项目所需要的包,在java开发中,架构的层次是以包的形式体现出来的
<table style="margin-left: 30px;">
<tbody>
<tr>
<td style="text-align: center;" colspan="3"><span style="font-size: 14px;"><strong>项目所需要的开发包(jar包)</strong></span></td>
</tr>
<tr>
<td><span style="font-size: 14px;"><strong>序号</strong></span></td>
<td><span style="font-size: 14px;"><strong>开发包名称</strong></span></td>
<td><span style="font-size: 14px;"><strong>描述</strong></span></td>
</tr>
<tr>
<td><span style="font-size: 14px;">1</span></td>
<td><span style="font-size: 14px;"><strong>dom4j-1.6.1.jar</strong></span></td>
<td><span style="font-size: 14px;">dom4j用于操作XML文件</span></td>
</tr>
<tr>
<td><span style="font-size: 14px;">2</span></td>
<td><span style="font-size: 14px;"><strong>jaxen-1.1-beta-6.jar</strong></span></td>
<td><span style="font-size: 14px;">用于解析XPath表达式</span></td>
</tr>
<tr>
<td><span style="font-size: 14px;">3</span></td>
<td><span style="font-size: 14px;"><strong>commons-beanutils-1.8.0.jar</strong></span></td>
<td><span style="font-size: 14px;">工具类,用于处理bean对象</span></td>
</tr>
<tr>
<td><span style="font-size: 14px;">4</span></td>
<td><span style="font-size: 14px;"><strong>commons-logging.jar</strong></span></td>
<td><span style="font-size: 14px;"><span style="font-size: 14px;"><strong>commons-beanutils-1.8.0.jar</strong></span>的依赖jar包</span></td>
</tr>
<tr>
<td><span style="font-size: 14px;">5</span></td>
<td><span style="font-size: 14px;"><strong>jstl.jar</strong></span></td>
<td><span style="font-size: 14px;">jstl标签库和EL表达式依赖包</span></td>
</tr>
<tr>
<td><span style="font-size: 14px;">6</span></td>
<td><span style="font-size: 14px;"><strong>standard.jar</strong></span></td>
<td><span style="font-size: 14px;">jstl标签库和EL表达式依赖包</span></td>
</tr>
</tbody>
</table>
<table style="margin-left: 30px;">
<tbody>
<tr>
<td style="margin-left: 90px; text-align: center;" colspan="4"><span style="font-size: 14px;"><strong>项目所需要的包</strong></span></td>
</tr>
<tr style="margin-left: 30px;">
<td style="margin-left: 30px;"><span style="font-size: 14px;"><strong>序号</strong></span></td>
<td style="margin-left: 30px;"><span style="font-size: 14px;"><strong>包名</strong></span></td>
<td style="margin-left: 30px;"><span style="font-size: 14px;"><strong>描述</strong></span></td>
<td style="margin-left: 30px;"><span style="font-size: 14px;"><strong>所属层次</strong></span></td>
</tr>
<tr style="margin-left: 30px;">
<td style="margin-left: 30px;"><span style="color: #ff0000;"><strong><span style="font-size: 14px;">1</span></strong></span></td>
<td style="margin-left: 30px;"><span style="color: #ff0000;"><strong><span style="font-size: 14px;">me.gacl.domain</span></strong></span></td>
<td style="margin-left: 30px;"><span style="color: #ff0000;"><span style="font-size: 14px;">存放系统的JavaBean类(只包含简单的属性以及属性对应的get和set方法,不包含具体的业务处理方法),提供给【数据访问层】、【业务处理层】、【Web层】来使用</span></span></td>
<td style="margin-left: 30px;"><span style="color: #ff0000;"><strong> </strong>domain(域模型)层</span></td>
</tr>
<tr style="margin-left: 30px;">
<td style="margin-left: 30px;"><span style="font-size: 14px; color: #ff0000;">2</span></td>
<td style="margin-left: 30px;"><span style="font-size: 14px; color: #ff0000;"><strong><strong>me.gacl.</strong>dao</strong></span></td>
<td style="margin-left: 30px;"><span style="font-size: 14px; color: #ff0000;">存放访问数据库的操作接口类</span></td>
<td style="margin-left: 30px;"><span style="font-size: 14px; color: #ff0000;">数据访问层</span></td>
</tr>
<tr style="margin-left: 30px;">
<td style="margin-left: 30px;"><span style="font-size: 14px; color: #ff0000;">3</span></td>
<td style="margin-left: 30px;"><span style="font-size: 14px; color: #ff0000;"><strong><strong>me.gacl.</strong>dao.impl</strong></span></td>
<td style="margin-left: 30px;"><span style="font-size: 14px; color: #ff0000;">存放访问数据库的操作接口的实现类</span></td>
</tr>
<tr style="margin-left: 30px;">
<td style="margin-left: 30px;"><span style="font-size: 14px; color: #ff0000;">4</span></td>
<td style="margin-left: 30px;"><span style="font-size: 14px; color: #ff0000;"><strong><strong>me.gacl.</strong>service</strong></span></td>
<td style="margin-left: 30px;"><span style="font-size: 14px; color: #ff0000;">存放处理系统业务接口类</span></td>
<td style="margin-left: 30px;"><span style="font-size: 14px; color: #ff0000;">业务处理层</span></td>
</tr>
<tr style="margin-left: 30px;">
<td style="margin-left: 30px;"><span style="font-size: 14px; color: #ff0000;">5</span></td>
<td style="margin-left: 30px;"><span style="font-size: 14px; color: #ff0000;"><strong><strong>me.gacl.</strong>service.impl</strong></span></td>
<td style="margin-left: 30px;"><span style="font-size: 14px; color: #ff0000;">存放处理系统业务接口的实现类</span></td>
</tr>
<tr style="margin-left: 30px;">
<td style="margin-left: 30px;"><span style="font-size: 14px; color: #ff0000;">6</span></td>
<td style="margin-left: 30px;"><span style="font-size: 14px; color: #ff0000;"><strong><strong>me.gacl.</strong>web.controller</strong></span></td>
<td style="margin-left: 30px;"><span style="font-size: 14px; color: #ff0000;">存放作为系统控制器的Servlet</span></td>
<td style="margin-left: 30px;"><span style="font-size: 14px; color: #ff0000;">Web层(表现层)</span></td>
</tr>
<tr style="margin-left: 30px;">
<td style="margin-left: 30px;"><span style="font-size: 14px; color: #ff0000;">7</span></td>
<td style="margin-left: 30px;"><span style="font-size: 14px; color: #ff0000;"><strong><strong>me.gacl.</strong>web.UI</strong></span></td>
<td style="margin-left: 30px;"><span style="font-size: 14px; color: #ff0000;"> 存放为用户提供用户界面的servlet(UI指的是user interface)</span></td>
</tr>
<tr style="margin-left: 30px;">
<td style="margin-left: 30px;"><span style="font-size: 14px; color: #ff0000;">8</span></td>
<td style="margin-left: 30px;"><span style="font-size: 14px; color: #ff0000;"><strong><strong>me.gacl.web.filter</strong></strong></span></td>
<td style="margin-left: 30px;"><span style="font-size: 14px; color: #ff0000;">存放系统的用到的过滤器(Filter)</span></td>
</tr>
<tr style="margin-left: 30px;">
<td style="margin-left: 30px;"><span style="font-size: 14px; color: #ff0000;">9</span></td>
<td style="margin-left: 30px;"><span style="font-size: 14px; color: #ff0000;"><strong><strong>me.gacl.web.listener</strong></strong></span></td>
<td style="margin-left: 30px;"><span style="font-size: 14px; color: #ff0000;"><span style="font-size: 14px;">存放系统的用到的监听器(<span style="font-size: 14px;"><strong><strong>Listener</strong></strong></span>)</span></span></td>
</tr>
<tr style="margin-left: 30px;">
<td style="margin-left: 30px;"><span style="font-size: 14px;">10</span></td>
<td style="margin-left: 30px;"><span style="font-size: 14px;"><strong><strong>me.gacl</strong>.util</strong></span></td>
<td style="margin-left: 30px;"><span style="font-size: 14px;">存放系统的通用工具类<span style="font-size: 14px;"><span style="font-size: 14px;">,提供给【数据访问层】、【业务处理层】、【Web层】来使用</span></span></span></td>
<td> </td>
</tr>
<tr style="margin-left: 30px;">
<td style="margin-left: 30px;"><span style="font-size: 14px;">11</span></td>
<td style="margin-left: 30px;"><span style="font-size: 14px;"><strong>junit.test</strong></span></td>
<td style="margin-left: 30px;"><span style="font-size: 14px;">存放系统的测试类</span></td>
<td> </td>
</tr>
</tbody>
</table>
一个良好的JavaWeb项目架构应该具有以上的11个包,这样显得层次分明,各个层之间的职责也很清晰明了,搭建JavaWeb项目架构时,就按照上面的1~11的序号顺序创建包:domain→dao→dao.impl→service→service.impl→web.controller→web.UI→web.filter→web.listener→util→junit.test,包的层次创建好了,项目的架构也就定下来了,当然,在实际的项目开发中,也不一定是完完全全按照上面说的来创建包的层次结构,而是根据项目的实际情况,可能还需要创建其他的包,这个得根据项目的需要来定了
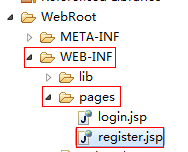
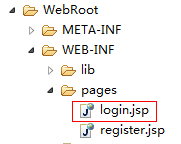
在src目录(类目录)下面,创建用于保存用户数据的xml文件(DB.xml)
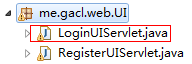
在WEB-INF目录下创建一个pages目录,pages目录存放系统的一些受保护(不允许用户直接通过URL地址访问)的jsp页面,用户要想访问这些受保护的jsp页面,那么只能通过me.gacl.web.UI这个包里面的Servlet
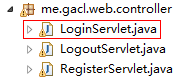
创建好的项目如下图(图-1)所示:
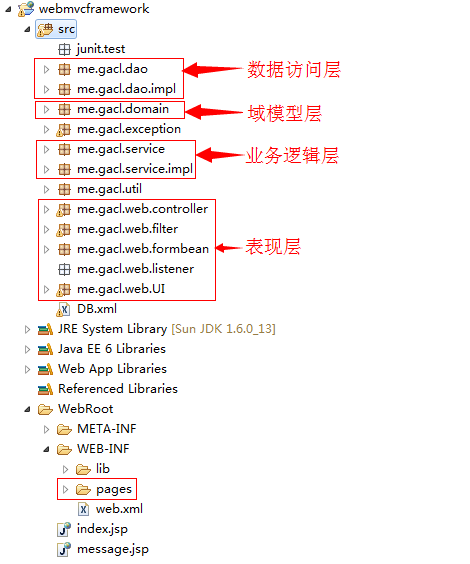

图-1
三、分层架构的代码编写
分层架构的代码也是按照【域模型层(domain)】→【数据访问层(dao、dao.impl)】→【业务处理层(service、service.impl)】→【表现层(web.controller、web.UI、web.filter、web.listener)】→【工具类(util)】→【测试类(junit.test)】的顺序进行编写的。
3.1、开发domain层
在me.gacl.domain包下创建一个User类
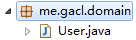
User类具体代码如下:
   1 package me.gacl.domain;
     2
     3 import java.io.Serializable;
     4 import java.util.Date;
     5 /**
     6  * @author gacl
     7  * 用户实体类
     8  */
     9 public class User implements Serializable {
    10
    11     private static final long serialVersionUID = -4313782718477229465L;
    12
    13     // 用户ID
    14     private String id;
    15     // 用户名
    16     private String userName;
    17     // 用户密码
    18     private String userPwd;
    19     // 用户邮箱
    20     private String email;
    21     // 用户生日
    22     private Date birthday;
    23
    24     public String getId() {
    25         return id;
    26     }
    27
    28     public void setId(String id) {
    29         this.id = id;
    30     }
    31
    32     public String getUserName() {
    33         return userName;
    34     }
    35
    36     public void setUserName(String userName) {
    37         this.userName = userName;
    38     }
    39
    40     public String getUserPwd() {
    41         return userPwd;
    42     }
    43
    44     public void setUserPwd(String userPwd) {
    45         this.userPwd = userPwd;
    46     }
    47
    48     public String getEmail() {
    49         return email;
    50     }
    51
    52     public void setEmail(String email) {
    53         this.email = email;
    54     }
    55
    56     public Date getBirthday() {
    57         return birthday;
    58     }
    59
    60     public void setBirthday(Date birthday) {
    61         this.birthday = birthday;
    62     }
    63 }
3.2、开发数据访问层(dao、dao.impl)
在me.gacl.dao包下创建一个IUserDao接口类,对于开发接口类,我习惯以字母I作类的前缀,这样一眼就看出当前这个类是一个接口,这也算是一种良好的开发习惯吧,通过看类名就可以方便区分出是接口还是具体的实现类。
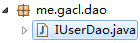
IUserDao接口的具体代码如下:
   1 package me.gacl.dao;
     2
     3 import me.gacl.domain.User;
     4
     5 public interface IUserDao {
     6
     7     /**
     8      * 根据用户名和密码来查找用户
     9      * @param userName
    10      * @param userPwd
    11      * @return 查到到的用户
    12      */
    13     User find(String userName, String userPwd);
    14
    15     /**
    16      * 添加用户
    17      * @param user
    18      */
    19     void add(User user);
    20
    21     /**根据用户名来查找用户
    22      * @param userName
    23      * @return 查到到的用户
    24      */
    25     User find(String userName);
    26 }
对于接口中的方法定义,这个只能是根据具体的业务来分析需要定义哪些方法了,但是无论是多么复杂的业务,都离不开基本的CRUD(增删改查)操作,Dao层是直接和数据库交互的,所以Dao层的接口一般都会有增删改查这四种操作的相关方法。
在me.gacl.dao.impl包下创建一个UserDaoImpl类
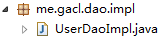
UserDaoImpl类是IUserDao接口的具体实现类,对于接口的实现类命名方式,我习惯以"接口名(去除前缀I)+impl"形式或者"接口名+impl"形式来命名:IUserDao(接口)→****UserDaoImpl(实现类)或者IUserDao(接口)→IUserDaoImpl(实现类),这也算是一些个人的编程习惯吧,平时看到的代码大多数都是以这两种形式中的一种来来命名接口的具体实现类的,反正就是要能够一眼看出接口对应的实现类是哪一个就可以了。
UserDaoImpl类的具体代码如下:
   1 package me.gacl.dao.impl;
     2
     3 import java.text.SimpleDateFormat;
     4 import org.dom4j.Document;
     5 import org.dom4j.Element;
     6 import me.gacl.dao.IUserDao;
     7 import me.gacl.domain.User;
     8 import me.gacl.util.XmlUtils;
     9
    10 /**
    11  * IUserDao接口的实现类
    12  * @author gacl
    13  */
    14 public class UserDaoImpl implements IUserDao {
    15
    16     @Override
    17     public User find(String userName, String userPwd) {
    18         try{
    19             Document document = XmlUtils.getDocument();
    20             //使用XPath表达式来操作XML节点
    21             Element e = (Element) document.selectSingleNode("//user[@userName='"+userName+"' and @userPwd='"+userPwd+"']");
    22             if(e==null){
    23                 return null;
    24             }
    25             User user = new User();
    26             user.setId(e.attributeValue("id"));
    27             user.setEmail(e.attributeValue("email"));
    28             user.setUserPwd(e.attributeValue("userPwd"));
    29             user.setUserName(e.attributeValue("userName"));
    30             String birth = e.attributeValue("birthday");
    31             SimpleDateFormat sdf = new SimpleDateFormat("yyyy-MM-dd");
    32             user.setBirthday(sdf.parse(birth));
    33
    34             return user;
    35
    36         }catch (Exception e) {
    37             throw new RuntimeException(e);
    38         }
    39     }
    40
    41     @SuppressWarnings("deprecation")
    42     @Override
    43     public void add(User user) {
    44         try{
    45             Document document = XmlUtils.getDocument();
    46             Element root = document.getRootElement();
    47             Element user_node = root.addElement("user");  //创建user结点,并挂到root
    48             user_node.setAttributeValue("id", user.getId());
    49             user_node.setAttributeValue("userName", user.getUserName());
    50             user_node.setAttributeValue("userPwd", user.getUserPwd());
    51             user_node.setAttributeValue("email", user.getEmail());
    52
    53             SimpleDateFormat sdf=new SimpleDateFormat("yyyy-MM-dd");
    54             user_node.setAttributeValue("birthday", sdf.format(user.getBirthday()));
    55
    56             XmlUtils.write2Xml(document);
    57
    58         }catch (Exception e) {
    59             throw new RuntimeException(e);
    60         }
    61     }
    62
    63     @Override
    64     public User find(String userName) {
    65         try{
    66             Document document = XmlUtils.getDocument();
    67             Element e = (Element) document.selectSingleNode("//user[@userName='"+userName+"']");
    68             if(e==null){
    69                 return null;
    70             }
    71             User user = new User();
    72             user.setId(e.attributeValue("id"));
    73             user.setEmail(e.attributeValue("email"));
    74             user.setUserPwd(e.attributeValue("userPwd"));
    75             user.setUserName(e.attributeValue("userName"));
    76             String birth = e.attributeValue("birthday");
    77             SimpleDateFormat sdf = new SimpleDateFormat("yyyy-MM-dd");
    78             user.setBirthday(sdf.parse(birth));
    79
    80             return user;
    81
    82         }catch (Exception e) {
    83             throw new RuntimeException(e);
    84         }
    85     }
    86
    87 }
3.3、开发service层(service层对web层提供所有的业务服务)
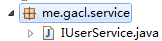
在me.gacl.service包中创建IUserService接口类
IUserService接口的具体代码如下:
   1 package me.gacl.service;
     2
     3 import me.gacl.domain.User;
     4 import me.gacl.exception.UserExistException;
     5
     6 public interface IUserService {
     7
     8     /**
     9      * 提供注册服务
    10      * @param user
    11      * @throws UserExistException
    12      */
    13     void registerUser(User user) throws UserExistException;
    14
    15     /**
    16      * 提供登录服务
    17      * @param userName
    18      * @param userPwd
    19      * @return
    20      */
    21     User loginUser(String userName, String userPwd);
    22 }
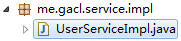
在me.gacl.service.impl包中创建UserServiceImpl类
UserServiceImpl类为IUserService接口的具体实现类,具体代码如下:
   1 package me.gacl.service.impl;
     2
     3 import me.gacl.dao.IUserDao;
     4 import me.gacl.dao.impl.UserDaoImpl;
     5 import me.gacl.domain.User;
     6 import me.gacl.exception.UserExistException;
     7 import me.gacl.service.IUserService;
     8
     9 public class UserServiceImpl implements IUserService {
    10
    11     private IUserDao userDao = new UserDaoImpl();
    12
    13     @Override
    14     public void registerUser(User user) throws UserExistException {
    15         if (userDao.find(user.getUserName())!=null) {
    16             //checked exception
    17             //unchecked exception
    18             //这里抛编译时异常的原因:是我想上一层程序处理这个异常,以给用户一个友好提示
    19             throw new UserExistException("注册的用户名已存在!!!");
    20         }
    21         userDao.add(user);
    22     }
    23
    24     @Override
    25     public User loginUser(String userName, String userPwd) {
    26         return userDao.find(userName, userPwd);
    27     }
    28
    29 }
3.4、开发web层
3.4.1、 开发注册功能
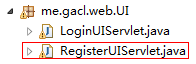
1、在me.gacl.web.UI包下写一个RegisterUIServlet为用户提供注册界面
RegisterUIServlet收到用户请求后,就跳到register.jsp
RegisterUIServlet的代码如下:
   1 package me.gacl.web.UI;
     2
     3 import java.io.IOException;
     4 import javax.servlet.ServletException;
     5 import javax.servlet.http.HttpServlet;
     6 import javax.servlet.http.HttpServletRequest;
     7 import javax.servlet.http.HttpServletResponse;
     8 /**
     9  * @author gacl
    10  * 为用户提供注册的用户界面的Servlet
    11  * RegisterUIServlet负责为用户输出注册界面
    12  * 当用户访问RegisterUIServlet时,就跳转到WEB-INF/pages目录下的register.jsp页面
    13  */
    14 public class RegisterUIServlet extends HttpServlet {
    15
    16     public void doGet(HttpServletRequest request, HttpServletResponse response)
    17             throws ServletException, IOException {
    18         request.getRequestDispatcher("/WEB-INF/pages/register.jsp").forward(request, response);
    19     }
    20
    21     public void doPost(HttpServletRequest request, HttpServletResponse response)
    22             throws ServletException, IOException {
    23         doGet(request, response);
    24     }
    25
    26 }
2、在/WEB-INF/pages/目录下编写用户注册的jsp页面register.jsp
凡是位于WEB-INF目录下的jsp页面是无法直接通过URL地址直接访问的,
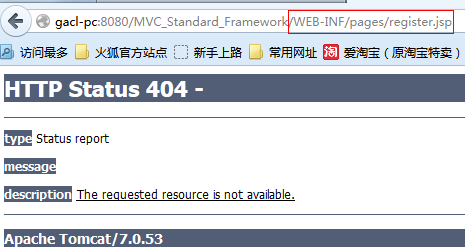
在开发中如果项目中有一些敏感web资源不想被外界直接访问,那么可以考虑将这些敏感的web资源放到WEB-INF目录下,这样就可以禁止外界直接通过URL来访问了。
register.jsp页面的代码如下:
   1 <%@ page language="java" pageEncoding="UTF-8"%>
     2 <!DOCTYPE HTML>
     3 <html>
     4     <head>
     5         <title>用户注册</title>
     6     </head>
     7
     8     <body style="text-align: center;">
     9         <form action="${pageContext.request.contextPath}/servlet/RegisterServlet" method="post">
    10             <table width="60%" border="1">
    11                 <tr>
    12                     <td>用户名</td>
    13                     <td>
    14
    15                         <input type="text" name="userName">
    16                     </td>
    17                 </tr>
    18                 <tr>
    19                     <td>密码</td>
    20                     <td>
    21                         <input type="password" name="userPwd">
    22                     </td>
    23                 </tr>
    24                 <tr>
    25                     <td>确认密码</td>
    26                     <td>
    27                         <input type="password" name="confirmPwd">
    28                     </td>
    29                 </tr>
    30                 <tr>
    31                     <td>邮箱</td>
    32                     <td>
    33                         <input type="text" name="email">
    34                     </td>
    35                 </tr>
    36                 <tr>
    37                     <td>生日</td>
    38                     <td>
    39                         <input type="text" name="birthday">
    40                     </td>
    41                 </tr>
    42                 <tr>
    43                     <td>
    44                         <input type="reset" value="清空">
    45                     </td>
    46                     <td>
    47                         <input type="submit" value="注册">
    48                     </td>
    49                 </tr>
    50             </table>
    51         </form>
    52     </body>
    53 </html>
register.jsp中的<form action="${pageContext.request.contextPath}/servlet/RegisterServlet" method="post">指明表单提交后,交给RegisterServlet进行处理
3、在me.gacl.web.controller包下编写用于处理用户注册的RegisterServlet
RegisterServlet担任着以下几个职责:
1、接收客户端提交到服务端的表单数据。
2、校验表单数据的合法性,如果校验失败跳回到register.jsp,并回显错误信息。
3、如果校验通过,调用service层向数据库中注册用户。
为了方便RegisterServlet接收表单数据和校验表单数据,在此我设计一个用于校验注册表单数据RegisterFormbean,再写WebUtils工具类,封装客户端提交的表单数据到formbean中。
在me.gacl.web.formbean包下创建一个用于校验注册表单数据RegisterFormbean
RegisterFormbean代码如下:
    1 package me.gacl.web.formbean;
      2
      3 import java.util.HashMap;
      4 import java.util.Map;
      5
      6 import org.apache.commons.beanutils.locale.converters.DateLocaleConverter;
      7
      8 /**
      9  * 封装的用户注册表单bean,用来接收register.jsp中的表单输入项的值
     10  * RegisterFormBean中的属性与register.jsp中的表单输入项的name一一对应
     11  * RegisterFormBean的职责除了负责接收register.jsp中的表单输入项的值之外还担任着校验表单输入项的值的合法性
     12  * @author gacl
     13  *
     14  */
     15 public class RegisterFormBean {
     16
     17     //RegisterFormBean中的属性与register.jsp中的表单输入项的name一一对应
     18     //<input type="text" name="userName"/>
     19     private String userName;
     20     //<input type="password" name="userPwd"/>
     21     private String userPwd;
     22     //<input type="password" name="confirmPwd"/>
     23     private String confirmPwd;
     24     //<input type="text" name="email"/>
     25     private String email;
     26     //<input type="text" name="birthday"/>
     27     private String birthday;
     28
     29
     30     /**
     31      * 存储校验不通过时给用户的错误提示信息
     32      */
     33     private Map<String, String> errors = new HashMap<String, String>();
     34
     35     public Map<String, String> getErrors() {
     36         return errors;
     37     }
     38
     39     public void setErrors(Map<String, String> errors) {
     40         this.errors = errors;
     41     }
     42
     43     /*
     44      * validate方法负责校验表单输入项
     45      * 表单输入项校验规则:
     46      *         private String userName; 用户名不能为空,并且要是3-8的字母 abcdABcd
     47      *         private String userPwd; 密码不能为空,并且要是3-8的数字
     48      *         private String confirmPwd; 两次密码要一致
     49      *         private String email; 可以为空,不为空要是一个合法的邮箱
     50      *         private String birthday; 可以为空,不为空时,要是一个合法的日期
     51      */
     52     public boolean validate() {
     53
     54         boolean isOk = true;
     55
     56         if (this.userName == null || this.userName.trim().equals("")) {
     57             isOk = false;
     58             errors.put("userName", "用户名不能为空!!");
     59         } else {
     60             if (!this.userName.matches("[a-zA-Z]{3,8}")) {
     61                 isOk = false;
     62                 errors.put("userName", "用户名必须是3-8位的字母!!");
     63             }
     64         }
     65
     66         if (this.userPwd == null || this.userPwd.trim().equals("")) {
     67             isOk = false;
     68             errors.put("userPwd", "密码不能为空!!");
     69         } else {
     70             if (!this.userPwd.matches("\\d{3,8}")) {
     71                 isOk = false;
     72                 errors.put("userPwd", "密码必须是3-8位的数字!!");
     73             }
     74         }
     75
     76         // private String password2; 两次密码要一致
     77         if (this.confirmPwd != null) {
     78             if (!this.confirmPwd.equals(this.userPwd)) {
     79                 isOk = false;
     80                 errors.put("confirmPwd", "两次密码不一致!!");
     81             }
     82         }
     83
     84         // private String email; 可以为空,不为空要是一个合法的邮箱
     85         if (this.email != null && !this.email.trim().equals("")) {
     86             if (!this.email.matches("\\w+@\\w+(\\.\\w+)+")) {
     87                 isOk = false;
     88                 errors.put("email", "邮箱不是一个合法邮箱!!");
     89             }
     90         }
     91
     92         // private String birthday; 可以为空,不为空时,要是一个合法的日期
     93         if (this.birthday != null && !this.birthday.trim().equals("")) {
     94             try {
     95                 DateLocaleConverter conver = new DateLocaleConverter();
     96                 conver.convert(this.birthday);
     97             } catch (Exception e) {
     98                 isOk = false;
     99                 errors.put("birthday", "生日必须要是一个日期!!");
    100             }
    101         }
    102
    103         return isOk;
    104     }
    105
    106     public String getUserName() {
    107         return userName;
    108     }
    109
    110     public void setUserName(String userName) {
    111         this.userName = userName;
    112     }
    113
    114     public String getUserPwd() {
    115         return userPwd;
    116     }
    117
    118     public void setUserPwd(String userPwd) {
    119         this.userPwd = userPwd;
    120     }
    121
    122     public String getConfirmPwd() {
    123         return confirmPwd;
    124     }
    125
    126     public void setConfirmPwd(String confirmPwd) {
    127         this.confirmPwd = confirmPwd;
    128     }
    129
    130     public String getEmail() {
    131         return email;
    132     }
    133
    134     public void setEmail(String email) {
    135         this.email = email;
    136     }
    137
    138     public String getBirthday() {
    139         return birthday;
    140     }
    141
    142     public void setBirthday(String birthday) {
    143         this.birthday = birthday;
    144     }
    145 }
在me.gacl.util包下创建一个WebUtils工具类,该工具类的功能就是封装客户端提交的表单数据到formbean中
   1 package me.gacl.util;
     2
     3 import java.util.Enumeration;
     4 import java.util.UUID;
     5 import javax.servlet.http.HttpServletRequest;
     6 import org.apache.commons.beanutils.BeanUtils;
     7
     8 /**
     9  * @author gacl
    10  * 把request对象中的请求参数封装到bean中
    11  */
    12 public class WebUtils {
    13
    14     /**
    15      * 将request对象转换成T对象
    16      * @param request
    17      * @param clazz
    18      * @return
    19      */
    20     public static <T> T request2Bean(HttpServletRequest request,Class<T> clazz){
    21         try{
    22             T bean = clazz.newInstance();
    23             Enumeration<String> e = request.getParameterNames();
    24             while(e.hasMoreElements()){
    25                 String name = (String) e.nextElement();
    26                 String value = request.getParameter(name);
    27                 BeanUtils.setProperty(bean, name, value);
    28             }
    29             return bean;
    30         }catch (Exception e) {
    31             throw new RuntimeException(e);
    32         }
    33     }
    34
    35     /**
    36      * 生成UUID
    37      * @return
    38      */
    39     public static String makeId(){
    40         return UUID.randomUUID().toString();
    41     }
    42
    43 }
最后看一下负责处理用户注册的RegisterServlet完整代码:
   1 package me.gacl.web.controller;
     2
     3 import java.io.IOException;
     4 import java.util.Date;
     5 import javax.servlet.ServletException;
     6 import javax.servlet.http.HttpServlet;
     7 import javax.servlet.http.HttpServletRequest;
     8 import javax.servlet.http.HttpServletResponse;
     9 import org.apache.commons.beanutils.BeanUtils;
    10 import org.apache.commons.beanutils.ConvertUtils;
    11 import org.apache.commons.beanutils.locale.converters.DateLocaleConverter;
    12 import me.gacl.domain.User;
    13 import me.gacl.exception.UserExistException;
    14 import me.gacl.service.IUserService;
    15 import me.gacl.service.impl.UserServiceImpl;
    16 import me.gacl.util.WebUtils;
    17 import me.gacl.web.formbean.RegisterFormBean;
    18 /**
    19  * 处理用户注册的Servlet
    20  * @author gacl
    21  *
    22  */
    23 public class RegisterServlet extends HttpServlet {
    24
    25     public void doGet(HttpServletRequest request, HttpServletResponse response)
    26             throws ServletException, IOException {
    27         //将客户端提交的表单数据封装到RegisterFormBean对象中
    28         RegisterFormBean formbean = WebUtils.request2Bean(request,RegisterFormBean.class);
    29         //校验用户注册填写的表单数据
    30         if (formbean.validate() == false) {//如果校验失败
    31             //将封装了用户填写的表单数据的formbean对象发送回register.jsp页面的form表单中进行显示
    32             request.setAttribute("formbean", formbean);
    33             //校验失败就说明是用户填写的表单数据有问题,那么就跳转回register.jsp
    34             request.getRequestDispatcher("/WEB-INF/pages/register.jsp").forward(request, response);
    35             return;
    36         }
    37
    38         User user = new User();
    39         try {
    40             // 注册字符串到日期的转换器
    41             ConvertUtils.register(new DateLocaleConverter(), Date.class);
    42             BeanUtils.copyProperties(user, formbean);//把表单的数据填充到javabean中
    43             user.setId(WebUtils.makeId());//设置用户的Id属性
    44             IUserService service = new UserServiceImpl();
    45             //调用service层提供的注册用户服务实现用户注册
    46             service.registerUser(user);
    47             String message = String.format(
    48                     "注册成功!!3秒后为您自动跳到登录页面!!<meta http-equiv='refresh' content='3;url=%s'/>",
    49                     request.getContextPath()+"/servlet/LoginUIServlet");
    50             request.setAttribute("message",message);
    51             request.getRequestDispatcher("/message.jsp").forward(request,response);
    52
    53         } catch (UserExistException e) {
    54             formbean.getErrors().put("userName", "注册用户已存在!!");
    55             request.setAttribute("formbean", formbean);
    56             request.getRequestDispatcher("/WEB-INF/pages/register.jsp").forward(request, response);
    57         } catch (Exception e) {
    58             e.printStackTrace(); // 在后台记录异常
    59             request.setAttribute("message", "对不起,注册失败!!");
    60             request.getRequestDispatcher("/message.jsp").forward(request,response);
    61         }
    62     }
    63
    64     public void doPost(HttpServletRequest request, HttpServletResponse response)
    65             throws ServletException, IOException {
    66         doGet(request, response);
    67     }
    68
    69 }
用户注册时如果填写的表单数据校验不通过,那么服务器端就将一个存储了错误提示消息和表单数据的formbean对象存储到request对象中,然后发送回register.jsp页面,因此我们需要在register.jsp页面中取出request对象中formbean对象,然后将用户填写的表单数据重新回显到对应的表单项上面,将出错时的提示消息也显示到form表单上面,让用户知道是哪些数据填写不合法!
修改register.jsp页面,代码如下:
   1 <%@ page language="java" pageEncoding="UTF-8"%>
     2 <!DOCTYPE HTML>
     3 <html>
     4     <head>
     5         <title>用户注册</title>
     6     </head>
     7
     8     <body style="text-align: center;">
     9         <form action="${pageContext.request.contextPath}/servlet/RegisterServlet" method="post">
    10             <table width="60%" border="1">
    11                 <tr>
    12                     <td>用户名</td>
    13                     <td>
    14                         <%--使用EL表达式${}提取存储在request对象中的formbean对象中封装的表单数据(formbean.userName)以及错误提示消息(formbean.errors.userName)--%>
    15                         <input type="text" name="userName" value="${formbean.userName}">${formbean.errors.userName}
    16                     </td>
    17                 </tr>
    18                 <tr>
    19                     <td>密码</td>
    20                     <td>
    21                         <input type="password" name="userPwd" value="${formbean.userPwd}">${formbean.errors.userPwd}
    22                     </td>
    23                 </tr>
    24                 <tr>
    25                     <td>确认密码</td>
    26                     <td>
    27                         <input type="password" name="confirmPwd" value="${formbean.confirmPwd}">${formbean.errors.confirmPwd}
    28                     </td>
    29                 </tr>
    30                 <tr>
    31                     <td>邮箱</td>
    32                     <td>
    33                         <input type="text" name="email" value="${formbean.email}">${formbean.errors.email}
    34                     </td>
    35                 </tr>
    36                 <tr>
    37                     <td>生日</td>
    38                     <td>
    39                         <input type="text" name="birthday" value="${formbean.birthday}">${formbean.errors.birthday}
    40                     </td>
    41                 </tr>
    42                 <tr>
    43                     <td>
    44                         <input type="reset" value="清空">
    45                     </td>
    46                     <td>
    47                         <input type="submit" value="注册">
    48                     </td>
    49                 </tr>
    50             </table>
    51         </form>
    52     </body>
    53 </html>
到此,用户注册功能就算是开发完成了!
下面测试一下开发好的用户注册功能:
输入URL地址:http://localhost:8080/webmvcframework/servlet/RegisterUIServlet访问register.jsp页面,运行效果如下:
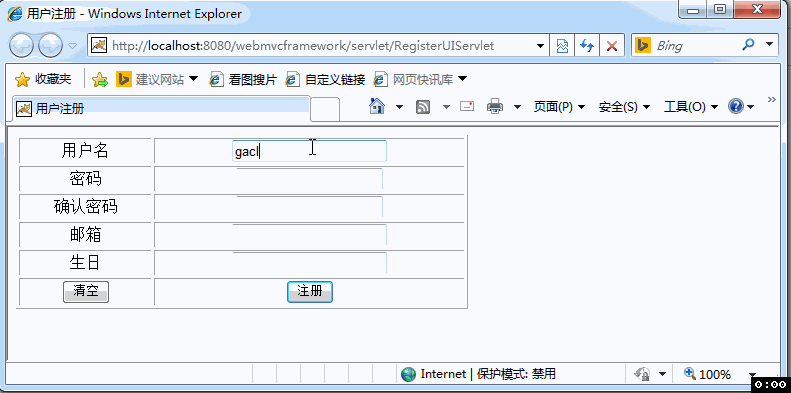
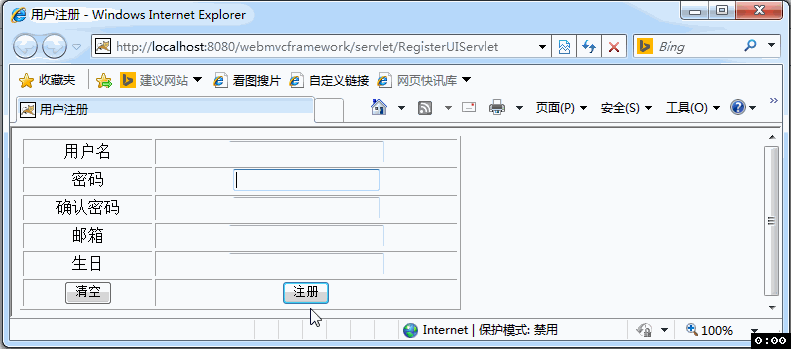
如果输入的表单项不符合校验规则,那么是无法进行注册的,运行效果如下:
3.4.2、 开发登录功能
1、在me.gacl.web.UI包下写一个LoginUIServlet为用户提供登录界面
LoginUIServlet收到用户请求后,就跳到login.jsp
LoginUIServlet的代码如下:
   1 package me.gacl.web.UI;
     2
     3 import java.io.IOException;
     4
     5 import javax.servlet.ServletException;
     6 import javax.servlet.http.HttpServlet;
     7 import javax.servlet.http.HttpServletRequest;
     8 import javax.servlet.http.HttpServletResponse;
     9
    10 /**
    11  * @author gacl
    12  * LoginUIServlet负责为用户输出登陆界面
    13  * 当用户访问LoginUIServlet时,就跳转到WEB-INF/pages目录下的login.jsp页面
    14  */
    15 public class LoginUIServlet extends HttpServlet {
    16
    17     public void doGet(HttpServletRequest request, HttpServletResponse response)
    18             throws ServletException, IOException {
    19
    20         request.getRequestDispatcher("/WEB-INF/pages/login.jsp").forward(request, response);
    21     }
    22
    23     public void doPost(HttpServletRequest request, HttpServletResponse response)
    24             throws ServletException, IOException {
    25         doGet(request, response);
    26     }
    27
    28 }
2、在/WEB-INF/pages/目录下编写用户登录的jsp页面login.jsp
login.jsp页面的代码如下:
   1 <%@ page language="java" pageEncoding="UTF-8"%>
     2 <!DOCTYPE HTML>
     3 <html>
     4   <head>
     5     <title>用户登陆</title>
     6   </head>
     7
     8   <body>
     9     <form action="${pageContext.request.contextPath }/servlet/LoginServlet" method="post">
    10         用户名:<input type="text" name="username"><br/>
    11         密码:<input type="password" name="password"><br/>
    12         <input type="submit" value="登陆">
    13     </form>
    14   </body>
    15 </html>
login.jsp中的<form action="${pageContext.request.contextPath}/servlet/LoginServlet" method="post">指明表单提交后,交给LoginServlet进行处理。
3、在me.gacl.web.controller包下编写用于处理用户登录的LoginServlet
LoginServlet的代码如下:
   1 package me.gacl.web.controller;
     2
     3 import java.io.IOException;
     4
     5 import javax.servlet.ServletException;
     6 import javax.servlet.http.HttpServlet;
     7 import javax.servlet.http.HttpServletRequest;
     8 import javax.servlet.http.HttpServletResponse;
     9
    10 import me.gacl.domain.User;
    11 import me.gacl.service.IUserService;
    12 import me.gacl.service.impl.UserServiceImpl;
    13
    14 /**
    15  * 处理用户登录的servlet
    16  * @author gacl
    17  *
    18  */
    19 public class LoginServlet extends HttpServlet {
    20
    21     public void doGet(HttpServletRequest request, HttpServletResponse response)
    22             throws ServletException, IOException {
    23
    24         //获取用户填写的登录用户名
    25         String username = request.getParameter("username");
    26         //获取用户填写的登录密码
    27         String password = request.getParameter("password");
    28
    29         IUserService service = new UserServiceImpl();
    30         //用户登录
    31         User user = service.loginUser(username, password);
    32         if(user==null){
    33             String message = String.format(
    34                     "对不起,用户名或密码有误!!请重新登录!2秒后为您自动跳到登录页面!!<meta http-equiv='refresh' content='2;url=%s'",
    35                     request.getContextPath()+"/servlet/LoginUIServlet");
    36             request.setAttribute("message",message);
    37             request.getRequestDispatcher("/message.jsp").forward(request, response);
    38             return;
    39         }
    40         //登录成功后,就将用户存储到session中
    41         request.getSession().setAttribute("user", user);
    42         String message = String.format(
    43                 "恭喜:%s,登陆成功!本页将在3秒后跳到首页!!<meta http-equiv='refresh' content='3;url=%s'",
    44                 user.getUserName(),
    45                 request.getContextPath()+"/index.jsp");
    46         request.setAttribute("message",message);
    47         request.getRequestDispatcher("/message.jsp").forward(request, response);
    48     }
    49
    50     public void doPost(HttpServletRequest request, HttpServletResponse response)
    51             throws ServletException, IOException {
    52         doGet(request, response);
    53     }
    54
    55 }
到此,用户登录的功能就算是开发完成了。
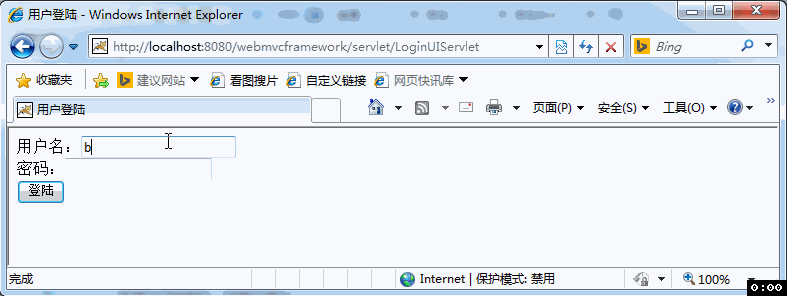
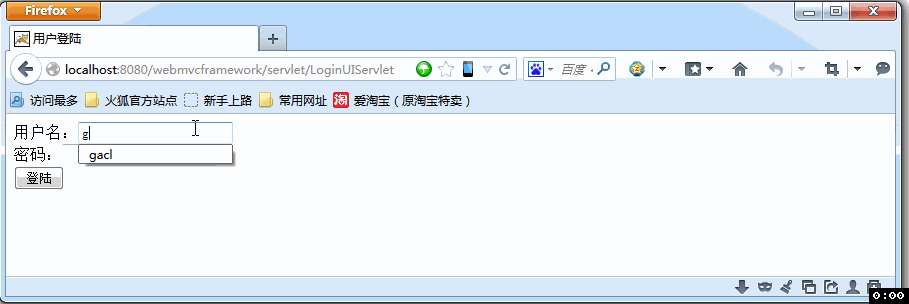
下面测试一下开发好的用户登录功能,输入URL地址:http://localhost:8080/webmvcframework/servlet/LoginUIServlet访问login.jsp页面,输入正确的用户名和密码进行登录,运行效果如下:
如果输入的用户名和密码错误,那么就无法登录成功,运行效果如下:

3.4.3、 开发注销功能
在me.gacl.web.controller包下编写用于处理用户注销的LogoutServlet
LogoutServlet的代码如下:
   1 package me.gacl.web.controller;
     2
     3 import java.io.IOException;
     4 import java.text.MessageFormat;
     5
     6 import javax.servlet.ServletException;
     7 import javax.servlet.http.HttpServlet;
     8 import javax.servlet.http.HttpServletRequest;
     9 import javax.servlet.http.HttpServletResponse;
    10
    11 public class LogoutServlet extends HttpServlet {
    12
    13     public void doGet(HttpServletRequest request, HttpServletResponse response)
    14             throws ServletException, IOException {
    15         //移除存储在session中的user对象,实现注销功能
    16         request.getSession().removeAttribute("user");
    17         //由于字符串中包含有单引号,在这种情况下使用MessageFormat.format方法拼接字符串时就会有问题
    18         //MessageFormat.format方法只是把字符串中的单引号去掉,不会将内容填充到指定的占位符中
    19         String tempStr1 = MessageFormat.format(
    20                 "注销成功!!3秒后为您自动跳到登录页面!!<meta http-equiv='refresh' content='3;url={0}'/>",
    21                 request.getContextPath()+"/servlet/LoginUIServlet");
    22         System.out.println(tempStr1);//输出结果:注销成功!!3秒后为您自动跳到登录页面!!<meta http-equiv=refresh content=3;url={0}/>
    23         System.out.println("---------------------------------------------------------");
    24         /**
    25          * 要想解决"如果要拼接的字符串包含有单引号,那么MessageFormat.format方法就只是把字符串中的单引号去掉,不会将内容填充到指定的占位符中"这个问题,
    26          * 那么可以需要使用单引号引起来的字符串中使用2个单引号引起来,例如:"<meta http-equiv=''refresh'' content=''3;url={0}''/>"
    27          * 这样MessageFormat.format("<meta http-equiv=''refresh'' content=''3;url={0}''/>","index.jsp")就可以正常返回
    28          * <meta http-equiv=''refresh'' content=''3;url=index.jsp'/>
    29          */
    30         String tempStr2 = MessageFormat.format(
    31                 "注销成功!!3秒后为您自动跳到登录页面!!<meta http-equiv=''refresh'' content=''3;url={0}''/>",
    32                 request.getContextPath()+"/servlet/LoginUIServlet");
    33         /**
    34          * 输出结果:
    35          * 注销成功!!3秒后为您自动跳到登录页面!!
    36          * <meta http-equiv='refresh' content='3;url=/webmvcframework/servlet/LoginUIServlet'/>
    37          */
    38         System.out.println(tempStr2);
    39
    40         String message = String.format(
    41                 "注销成功!!3秒后为您自动跳到登录页面!!<meta http-equiv='refresh' content='3;url=%s'/>",
    42                 request.getContextPath()+"/servlet/LoginUIServlet");
    43         request.setAttribute("message",message);
    44         request.getRequestDispatcher("/message.jsp").forward(request, response);
    45     }
    46
    47     public void doPost(HttpServletRequest request, HttpServletResponse response)
    48             throws ServletException, IOException {
    49         doGet(request, response);
    50     }
    51
    52 }
用户登录成功后,会将登录的用户信息存储在session中,所以我们要将存储在session中的user删除掉,这样就可以实现用户注销了。
用户登录成功后就会跳转到index.jsp页面,在index.jsp页面中放一个【退出登陆】按钮,当点击【退出登陆】按钮时,就访问LogoutServlet,将用户注销。
index.jsp的代码如下:
   1 <%@ page language="java"  pageEncoding="UTF-8"%>
     2 <%--为了避免在jsp页面中出现java代码,这里引入jstl标签库,利用jstl标签库提供的标签来做一些逻辑判断处理 --%>
     3 <%@ taglib uri="http://java.sun.com/jsp/jstl/core" prefix="c"%>
     4 <!DOCTYPE HTML>
     5 <html>
     6   <head>
     7     <title>首页</title>
     8      <script type="text/javascript">
     9         function doLogout(){
    10             //访问LogoutServlet注销当前登录的用户
    11             window.location.href="${pageContext.request.contextPath}/servlet/LogoutServlet";
    12         }
    13     </script>
    14   </head>
    15
    16   <body>
    17     <h1>孤傲苍狼的网站</h1>
    18     <hr/>
    19     <c:if test="${user==null}">
    20         <a href="${pageContext.request.contextPath}/servlet/RegisterUIServlet" target="_blank">注册</a>
    21         <a href="${pageContext.request.contextPath}/servlet/LoginUIServlet">登陆</a>
    22     </c:if>
    23     <c:if test="${user!=null}">
    24            欢迎您:${user.userName}
    25            <input type="button" value="退出登陆" onclick="doLogout()">
    26     </c:if>
    27     <hr/>
    28 </body>
    29 </html>
测试开发好的注销功能,效果如下:
到此,所有的功能都开发完成了,测试也通过了。
四、开发总结
通过这个小例子,可以了解到mvc分层架构的项目搭建,在平时的项目开发中,也都是按照如下的顺序来进行开发的:
1、搭建开发环境
1.1 创建web项目
1.2 导入项目所需的开发包
1.3 创建程序的包名,在java中是以包来体现项目的分层架构的
2、开发domain
把一张要操作的表当成一个VO类(VO类只定义属性以及属性对应的get和set方法,没有涉及到具体业务的操作方法),VO表示的是值对象,通俗地说,就是把表中的每一条记录当成一个对象,表中的每一个字段就作为这个对象的属性。每往表中插入一条记录,就相当于是把一个VO类的实例对象插入到数据表中,对数据表进行操作时,都是直接把一个VO类的对象写入到表中,一个VO类对象就是一条记录。每一个VO对象可以表示一张表中的一行记录,VO类的名称要和表的名称一致或者对应。
3、开发dao
3.1 DAO操作接口:每一个DAO操作接口规定了,一张表在一个项目中的具体操作方法,此接口的名称最好按照如下格式编写:“I表名称Dao”。
├DAO接口里面的所有方法按照以下的命名编写:
├更新数据库:doXxx()
├查询数据库:findXxx()或getXxx()
3.2 DAO操作接口的实现类:实现类中完成具体的增删改查操作
├此实现类完成的只是数据库中最核心的操作,并没有专门处理数据库的打开和关闭,因为这些操作与具体的业务操作无关。
4、开发service(service 对web层提供所有的业务服务)
5、开发web层
点击此处下载项目源码
作者:孤傲苍狼
来源:https://www.cnblogs.com/xdp-gacl/p/3902537.html
看完两件小事
如果你觉得这篇文章对你挺有启发,我想请你帮我两个小忙:
- 把这篇文章分享给你的朋友 / 交流群,让更多的人看到,一起进步,一起成长!
- 关注公众号 「方志朋」,公众号后台回复「666」 免费领取我精心整理的进阶资源教程

本文著作权归作者所有,如若转载,请注明出处
转载请注明:文章转载自「 Java极客技术学习 」https://www.javajike.com
 微信扫一扫
微信扫一扫